Showing posts with label patterns/tutorials. Show all posts

Sunday, November 30, 2014

Upcycled Fingerless Gloves!

So this idea just popped in my head today...
I should be doing other things, 
but I just got too giddy with the notion of a quick little project.

Behold! 
I upcycled my son's "too small" socks into Fingerless Gloves!


Just find some socks around the house.
You know they're there. Just taking up space: in a dust rag or waiting to be donated bin.

These particular socks fit Will when he was 4 years old, if that gives you any indication of sizing.


So I've found my socks, the next step is to cut the toes off.
You don't have to be too exact on this as the raw edge tends to roll.


Then comes the Thumb Hole.
In most of these "Character Socks" the trademark/copyright for said characters is somewhere
on the bottom of the foot. 

If its there, flatten the sock out and grab your sissors again...


I made my hole smaller than I thought would be necessary due to stretchage.
This placement also allows for the Heel to act as the Thumb Gusset. 
Magical!


Then try on for size!


Yay! You're done!

Unless...
you want to do a little Blanket Stitch on the raw edges of the Fingers and Thumb.

I opted not to finish off with stitching and just let them be.
I'm not looking at these to become heirlooms 
and it would take away from...
 my lightning fast start to finish time!


Sunday, October 6, 2013

Harry Potter Howler Mitts!

I made these for the Craftster.org Return to Hogwarts Swap: Round 4; my partner: 85%confusion.
Couldn't find a pattern anywhere for them, so I decided to create one of my own. :)


Photo courtesy 85%confusion

Materials
Worsted weight Red
Worsted weight White
size 6 needles: dpn or 29 inch circs or longer if you like magic loop, for working in the round.


CO 36 stitches with Red, "long tail" method for extra stretchyness.
Join for knitting in the round
Rounds 1-10: K2, P2 for 2x2 rib
Rounds 11-20 Knit in the round
Rounds 21-30 Stockinette flat back and forth (Row 21 purl, Row 22 knit and so on)
Join for knitting in the round again
Rounds 31-33 Knit in the round

Here's where the "split" happens for the Howler's "lips"
Knit 18 stitches leaving the other 18 on a length of yarn for picking up later.
(If working in magic loop, just leave remaining 18 stitches on the cable) 
Knit 5 rows stockinette 
Bind Off loosely

Now for the other side of the hand.
Knit the remaining 18 stitches off it's Holder 
Knit 5 rows stockinette
Bind Off loosely

Then we come to the "Teeth"
Go to the "non thumb" side where the flaps start.
Count down 3 rows and on inside (wrong side) of mitt pick up and knit 36 stitches 
Knit 1 row
Knit 5 rows of 2x2 rib (Same as the wrist cuff)
Bind Off in pattern

Weave in ends and go give that Ronald Weasley the "what for" for stealing a Muggle Car!!!


Special Thanks to Melissa for being my hand model!
George Costanza has NOTHIN' on you!

This is the very first pattern I've ever written down and to my knowledge it's original.
Please throw me a message if anything is askew,
I am incredibly open to constructive critisim. 


Monday, August 5, 2013

Minion Crowns from TP Rolls

How to make Minion Crowns from Toilet Paper Rolls
or...
Silly Minion time occupier.


Every Minion needs a crown, at least that's what Miss Morgan would have you believe...

Materials Needed
Toilet Paper Rolls
McDonald's Happy Meal Minions
Scissors
Markers
Willing Raucous Kids 

1. Get Your Materials rounded up


The TP rolls fit the Happy Meal Minions the best.
I make no promises for other sizes. :D

NO PROMISES!!!
(Look, they're not smiling!)


2. Cut the TP Rolls in half


3. Take your scissors and cut a zig zag across one edge


Ta Dah!


4. Find your kids and get a'markering (or a'painting, or leave them plain...the Minimal Minion look is HOT for fall!)


5. Sit back and admire the fruits of your labors. (And don't think about how many Happy Meals were consumed to acquire the Minions in the first place.)


The Minions were SO pleased with their new crowns they rejoiced!


 MINION PARTY!!!


This purple one started out okay.

There, you see him and he seems to be having an okay time...


 Whoops!
Party Foul!

Thursday, April 18, 2013

Morgan Lego Maze of Madness!

It's was Spring Break and Miss Morgan was out of school.
To say I needed to find fun things for them to do and not have the kids plopped in front of a screen is quite an understatement. I NEED to be better about this!
Thank glob for Pinterest (again).
Morgan and I got to create a marble maze from Legos and I think it really caught her imagination...

Check out her spokesmodel skills!
(Sometimes I really miss Star Search, ya know? )


Forgive me for abruptly ending her fantastic presentation of the Marble Maze...Morgan was about ready to invite the internet to our house by giving out our phone number!
SHEESH!

Wednesday, April 3, 2013

The Most Clever I'll EVER Be!

You know those cardboard Ikea Magazine Holders that seem like once you buy them they multiply?
(I never knew I bought THAT many!)

Well, on Pinterest...
I saw where they were good for storing tall narrow boxes like Aluminum Foil, Wax Paper, Zippy Bags, and the like.


But we have this little roll of sandwich baggies running around loose.
I use these in lunches and picking up dog poop in the backyard and the roll NEVER stays 
nice and neat.


Until one day, it dawned on me that the hole in the front could act as a feed for the baggies!


I really don't think I can top this "EUREKA" moment...


I'm not sure, but there may have been a victory lap.
I think the next step is to make them pretty somehow, now where did those Sharpies go?


Saturday, January 19, 2013

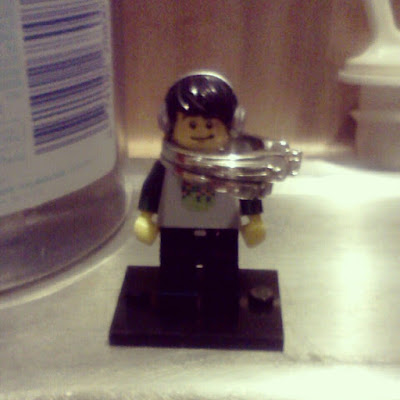
New Use For Lego Minifig

I decided that a turkey meatloaf was in order for the bitter cold weather we've been experiencing.
But were to put the ring while my hands were wrist deep in squishy, meaty goodness?

Behold!

I just happened to have Mr. DJ man (series 8) sitting right by the sink! 
Those little guys are great for EVERYTHING!


Thursday, December 13, 2012

Super Easy Pumpkin Muffins!

I probably make these mini pumpkin muffins 3 times a week, I love them so.
What's even better than the taste is....
ONLY 3 INGREDIENTS!

PREHEAT oven to 400 degrees
Don't forget to spray your muffin pan.
(I prefer the silicone mini muffin pan Ruby got me for Christmas years ago but this will work with any muffin-y type pan. Perhaps you may need to adjust cooking time accordingly)

Above I mentioned 3 ingredients, here they are:
1 box of yellow cake mix
1 can of pumpkin (not the pumpkin pie filling, keep it pure baby!)
About 1/3 of a bag of chocolate chips.


That's it! No water, oil, eggs, or anything!


DIRECTIONS:
First mix the cake mix and pumpkin until smooth.
Then add choc chips in and combine.
Throw the pan in a 400 degree oven for 20 minutes.
DONE!
So super easy

These are going to mix up way thicker than a usual muffin batter.
Don't be afraid!


As I said above, I favor the mini muffin pan. I also love to use a melon baller to scoop it in. 

A big THANK YOU to Mother in Law Lynda for tipping me off to the melon baller.


While the muffins are baking we love to eat the extra batter.
It's totally okay because of the "no eggs" thing. YAY FOR BATTER!

Here they are all baked, cooled, and ready to eat.
I recommend coffee to wash them down.


Mmmm, coffee.